This Article will show you how to move PuTTY profile to a new PC or User account.
Chances are that if you are changing computers and you are not doing a full migration of your applications, you’ll want to get all of your user profiles and app settings so you don’t have to enter everything again.
If you use PuTTY, you probably have a variety of SSH connections with ports etc and even configurations and settings you want to keep and move to your new PC.
All of your customized settings and connections for PuTTY are stored in the registry. Most articles just talk about exporting the registry keys and then importing them to your new PC. But there is a catch. If the User Profile ID number that is assigned in the windows registry is different on your new computer or user profile, you will get a registry import error.
Step 1
On your old PC or old user account, we need to first identify your username ID number that the windows registry uses for your profile.
Open your windows registry editor on your old PC. (hit your windows key and type registry. When Registry Editor shows, open it as administrator.
When it opens, in the address bar under the line with File, Edit View… copy and paste this address into it :
Computer\HKEY_LOCAL_MACHINE\SOFTWARE\Microsoft\Windows NT\CurrentVersion\ProfileList
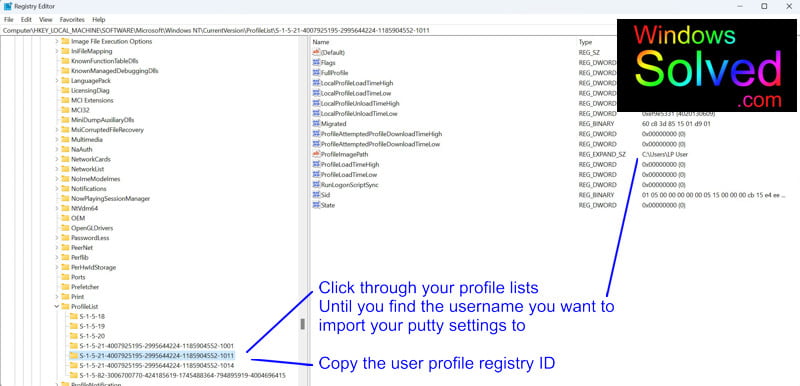
You will see the following :
Click on each of the entries underneath ProfileList on the left, until you find your username shown in the field ProfileImagePath on the right.
Copy the number on the left, as we will need it. It will start with something like S-1-5-……………….. Right click on it and select Copy Key Name, and paste it into Notepad so we can use it in the next step
Step 2
Now we need to find your PuTTY registry entries associated with your user profile.
Copy this line into notepad
Computer\HKEY_USERS\S-1-5-21-4007925195-2995324224-1169504552-1013\Software\SimonTatham
In notepad, replace the number we have in red above, with the your number you found in Step 1. It should already be in notepad.
Now copy the address with your number in it, and paste it into the Windows Registry Editor address bar.
On the left window, right click on SimonTatham and select export. Name the file something like oldputtyregisterykeys.reg
If you are setting up a new computer, copy this file to your new computer (use a USB stick etc)
Step 3
Repeat Step 1, so you can find the Windows Registry ID number for your new use profile.
If you are setting up a new computer, do this on your new computer!
Copy that new number S-1-5-……………….. into Notepad.
Step 4
Open the registry file you exported (e.g. oldputtyregisterykeys.reg) by right clicking on it, and select Open With and choose Notepad.
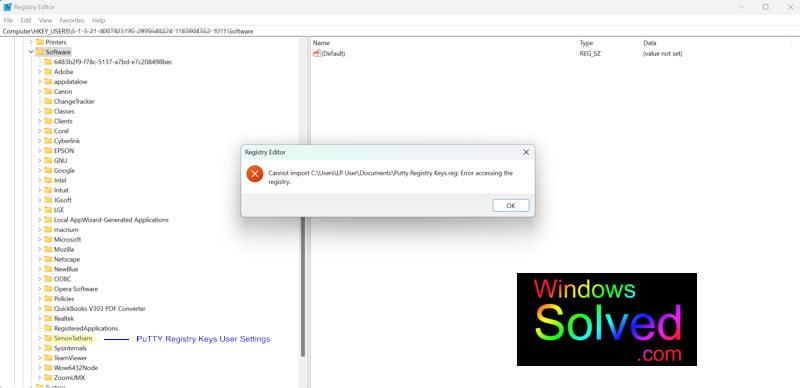
If you try double clicking on it, it will ask for administrator permission but the registry editor will most likely give you an error saying it cannot import the file, as per the first image at the top of this post. This is because the user profile numbers from the old user profile are different to the new user profile – they don’t match.
As per the image below, highlight the old user ID number and copy.
In Notepad, press Ctrl+H to open the search and replace.
Paste the number you just copied in this step into the find field (first field)
Paste your new number into the replace field (second field). This is new profile ID number that you got in Step 3.
Select Replace All.
In Notepad, File > Save As > name the file newputtyregisterykeys.reg and make sure that Save as type is shown as All Files (*.*) We need the file saved with the .reg extension and not Notepad’s .txt. extension.

Step 5
Install PuTTY on your new computer if you haven’t already done so.
Open Windows Explorer, and navigate to where you saved your new newputtyregisterykeys.reg file.
Double click on it.
You should be asked for administrator permission to allow it to make changes to your computer. Approve it.
You should then get a message saying along the lines of ªRegistry File Imported”
Open PuTTY and all of your user settings and saved connections should be displaying – just like your old computer and/or profile.
This solution was developed and confirmed in Windows 11 (22H2) with PuTTY (v 0.78) by windowssolved.com |
| This is an original article copyright to windowssolved.com This article may be shared via link to this page. You may not repost the content of this page, even with attribution without prior written permission. |


Excellent blog post. I certainly love this website. Keep it up!